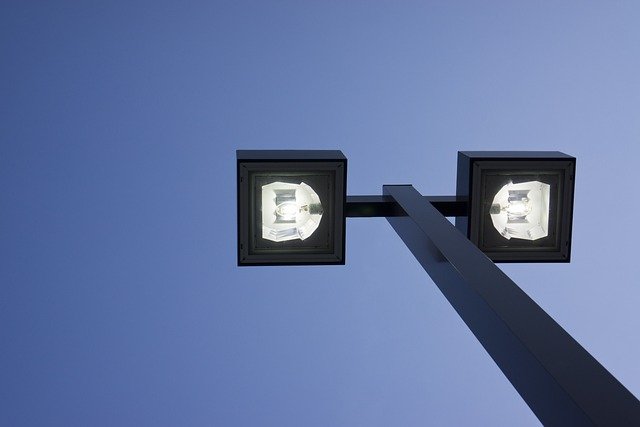
A secure and solid light pole installation is key to overall safety
While a street light pole installation might not seem to be as much of a big deal, it goes a long way in illuminating our outdoor spaces. So much so that from the local streets to parks to walkways to major highways, all depend on light poles for proper lighting after dark.
And even though people generally fail to notice the importance of pole lighting, they do feel its absence, especially when walking or driving through a dark area.
Think about a parking area with no light poles at all. You don’t want to park your vehicle or even venture around such a space, right?
Now, when it comes to street light poles, the right installation is a prerequisite, among other factors such as quality materials, fixtures, etc. That’s because a faulty installation will not only make passersby feel unsafe but also put them at risk of a major injury.
The integration of IP cameras, often mounted on light poles, further enhances safety by enabling continuous surveillance and monitoring in public spaces.
And this brings the onus on lighting contractors and installation workers, among others.
Wondering how you can install light poles and fixtures right the first time?
You’re at the right spot, as we’ve created a detailed guide on installing street light poles and fixtures. So let’s get started and have a look up close.
How do you begin with street light pole installation?
Easy as it may seem, installing street lights can be a long and tedious process. And apart from physical exhaustion, there’s a good chance you might feel burnout.
Nevertheless, some initial pre-installation steps done right, and you can make the entire process way simpler. And that includes:
1. Understanding local codes for lighting
Before you start planning out a street light installation project, it’s essential that you understand the local regulations on lighting. Also, you should ensure that your coworkers are also aware of these rules since their role in installation is as crucial as yours.
You see, different municipalities and counties have different street lighting requirements. Similarly, some Homeowners Associations can also have their own criteria for light pole height, fixture elevation, brightness levels, etc.
For instance, if you’re looking to install street light poles on certain seafront locations in Florida, the FWC regulations will require you to install turtle safe lighting.
2. Taking into account the wind rating
As you might be aware, the wind rating of an area plays a major role in deciding the kind of building design and construction.
But did you know that wind also affects light pole installations?
For starters, the wind rating will decide how deep does a light pole needs to be. That’s because the wind patterns and speed have a direct bearing on the stability of the pole.
Not to mention, light poles are more vulnerable to high-speed winds than any other structure since they’re standalone units. And that makes a precise understanding of year-round wind patterns even more critical.
For instance, when installing a light pole in hurricane-prone areas of the country, you’ll have to make a deeper concrete base than in other locations.
Note: you’ll have to take special caution when installing a pole 25 feet or taller in a high wind area.
Poles in such areas are exposed to wind-induced vibrations, which are at times so severe that they cause the metal welds to break. So you should ensure both materials and installation are top-notch and are able to meet the special wind requirements.
3. Factoring in the soil
Like any construction, light pole installations are also affected by the type of soil.
How?
Although light poles can be installed in just about any soil, the installation requirements differ from soil to soil. Meaning you’ll have to get a soil sampling and analyze the results before proceeding further with the installation.
For instance, the soil should be such that it doesn’t hold water, as wet soil can make the foundation of the pole very unstable.
Similarly, you’ve got to consider how firm and sturdy the soil is since less solid soil will need a deeper light pole foundation.
How to install a light pole?
Having figured out the pre-installation basics, you can now start with the actual street light pole installation procedure, which we’ve divided into seven steps.
While the exact installation steps might differ depending on your installation requirements and local conditions, they’ll be more or less similar to our standard street light installation procedure, which includes:
Step 1. Locating underground cables and pipelines
Before you can begin digging the ground for a pole foundation, it’s important to fully understand the location of underground pipelines and cables in that area as well as local and federal regulations on excavation. That’s because a precise knowledge of what’s under your feet will ensure you don’t accidentally damage any pre-existing underground infrastructure.
The municipalities and counties have detailed maps of underground pipelines and cables, something you can source for this purpose.
Step 2. Subgrade excavation
This is the first step in installing a light pole, which involves digging the subgrade or the soil surface. And the main purpose of this excavation is to create temporary rainwater drainage that prevents water logging in the foundation excavation.
We suggest you create an excavation blueprint in accordance with the municipal maps since some underground infrastructure might be right under the subgrade.
Step 3. Foundation excavation
This is the main excavation for pole installation, wherein you’ll likely need an excavator to dig deep.
Now, that’s possible that you might over excavate despite the prior calculations and handy blueprints. But that isn’t a worrying sign, as its a commonplace in almost all excavations.
In fact, you can easily fix over excavations both in terms of depth and width by filling in sand backfill or crushed stones.
Step 4. Installing steel bars and plates
After digging into the required depth, you can now start installing the steel bars and metal plates in there. Also, you should clamp the materials along the way as it ensures they stay in place precisely to the blueprint.
Here, it’s also important to make sure that the rebars and other metal structures meet the quality standards.
Step 5. Pouring in concrete
Once your rebars and plates are in place, it’s time to pour in concrete. And although it looks simple, concrete pouring is a complex process and needs expertise.
You see, the light pole gains its strength from the concrete, which means you’ve to do it right. Also, concrete pouring has the least room for error since a faulty pouring can damage the whole foundation.
As such, you should ensure that concrete is poured in a symmetrical and stratified manner and that it has a controlled thickness not exceeding 11 inches.
Furthermore, it’s essential to carry out a post-pouring process of concrete insulation and moisturization after it gains a 2.5MPa strength.
Step 6. Backfilling the base
Now that the concrete has hardened and is firmly in its place, you can backfill the base.
Note: you shouldn’t use the soil you’ve excavated for backfilling as it gets loose during excavation and might weaken your foundation.
Step 7. Mounting the light pole
The last step in street light installation, pole mounting is supposed to be done with utmost caution and with all the safety measures in place.
To begin with, you’ll need a crane, a locking buckle, and a lift control rope to erect the pole. And this will be followed by dry mortar leveling and vertical ball spotting.
Further, anchor screws should be installed right after pole erection to minimize the chances of mishaps.
Note: it’s important to have the municipal permit handy, as partial or full road closures may be necessary. Also, some locals might object to the work, in which case the permit will help you avoid any potential troubles.
You may also want to read – DIY Solar Panel Installation: A Complete Guide For 2023.
The methods of installing light poles
Talking about installation methods, there are two methods that you can use to install a street lamp pole, namely direct burial and anchor-based pole installation. And the method that you choose will depend on a lot of factors, such as location, local regulations, etc.
So let’s have a closer look at the two installation methods and their ideal application.
1. Direct burial method of light pole installation
As the name itself suggests, a direct burial pole installation method allows you to install a pole right into the ground. Herein, you don’t even need rebars or concrete filling, as the light pole stands firmly by itself.
At most, you can consider backfilling the excavation with crushed stones to provide additional support to the pole.
Also called the embedded method, this is by far the most cost-efficient way of installing a street or residential light pole. That’s because it eliminates various steps of installation while also significantly reducing the material requirement.
For instance, you don’t need anchor bolts and base plates, among others, for installation.
Not to mention, direct burial saves up a lot of time and, as a result, speeds up the pace of your overall installation project.
But there’s a catch with this method.
Direct installation means the pole will be in direct contact with the soil and exposed to wear from rust. Meaning when using the direct burial method, you might have to limit yourself to either fiberglass or aluminum as the light pole materials since they’re rust-free.
Similarly, this method is not ideal for all locations and can only be used at places that have firm soil. So you can’t use direct burial for areas with sandy, wet, or loose soil.
Can you use concrete with direct burial?
Yes, you can.
In fact, concrete can be the best way to solidify a direct burial pole installation without any additional effort. You can simply use a concrete mixture to backfill the excavation instead of soil or stone crush.
2. Anchor-based method lighting pole installation
Compared to direct burial, an anchor-based pole installation will need a lot more time and investment. That’s because such an installation will include all the steps that we discussed earlier.
Nevertheless, this method offers the most solid pole installation and is thus the ideal solution for certain locations.
For instance, when installing a light pole in areas with high wind ratings, the anchor-based method offers unmatched reliability.
Similarly, the installation method also allows you to ensure a safe concrete light pole installation in locations with sandy or loose soil.
Fun fact: light pole replacement is super easy with the anchor-based method.
You see, unlike direct burial, the light poles in this method are essentially bolted to the base structure. Meaning you need not undertake an excavation every time you’re supposed to replace a pole.
And this makes the anchor-based method ideal for parking lot light pole installation among other such places where chances of accidents and subsequent pole damages are high.
Now, when it comes to using this method, there are two foundation building methods you can follow, namely:
A. Concrete foundation
This foundation building method follows exactly what we discussed in the pole installation steps, including excavation, concrete porting, and attaching anchor bolts.
B. Helix foundation
Helix foundations are different from concrete foundations, and they use the same method as seen in power distribution lines and mobile phone towers, among others.
Herein, you need not use any concrete at all, as the grounded anchors and a helix-shaped plate hold every component of the light pole firmly in place.
You may also want to read – Everything You Need To Know About Turtle Friendly LED Lamps.
Commercial vs. residential light pole installation: what’s the difference?

If you’re looking to install light poles on your residential property, the installation materials and methods will be entirely different.
That’s because commercial light poles are designed to withstand heavy wear. Also, they need to meet local and state commercial light pole installation guidelines. And that might not be the case with a residential installation.
Also, the lighting requirements are different on private residential property in terms of pole height, illumination, etc.
For instance, you can use the direct-burial method to install a light pole on your residential property. However, commercial properties need a more solid method, which makes the costlier anchor-based installation necessary. After all, any potential problem with direct-burial lamps can be flagged as a fault by commercial building inspectors. As a result, you might have to rework your light poles among other outdoor lighting systems, which will only add up costs.
Similarly, a residential installation can be completed more quickly, thus saving up costs.
In short, residential light pole installations are quicker, cheaper, and more convenient compared to commercial installations.
Light pole installation: Frequently asked questions
How to install street light pole?
As I explained in the above sections, installing a street light involves a complex process wherein you’ve to factor everything from underground cables and pipes to local and federal codes.
For instance, you’ll start with assessing the area and locating any pipelines or cable networks that might be present underneath.
Thereafter, you’ll have to choose one of the popular street light installation methods such as direct burial or anchor-based installation.
And this will be followed by actual installation steps such as excavation, pole installation, concrete pouring, backfilling, and light fixture mounting.
You can follow the detailed steps above to develop in-depth knowledge about how to install a light pole.
How to install solar street light?
Solar street light pole installation process is similar to regular light poles. Meaning, you’ll follow the same methods and steps that I mentioned above.
However, the street light installation procedure might differ since these lights are powered by independent solar panels rather than the local grid.
For instance, after installing the light pole, you’ll need to mount the light fixture as well as a solar panel atop it. And configuring this lighting module will be different from non-solar street lights.
But that said, some solar light pole and fixture combos come with solar panels wrapped around the pole itself, making installation a lot easier.
Curious where to shop for such light poles and fixtures?
You can go through our blog: 11 Best Solar Street Lights.
What is the right method for parking lot light pole installation?
Parking lots are such spaces that call for the highest safety and quality standards. And to that end, the anchor-based method is perfect for parking lot light pole installation.
After all, the anchor-based method involves rigorous safety steps such as a deeper excavation, concrete pouring, backfilling, etc.
How much does installing a light pole cost?
When it comes to the total cost of installing light poles, there isn’t a fixed number since the cost differs based on certain factors such as location, materials, labor, etc.
However, here’s an average cost estimate to give you an idea:
- Direct burial – $500 or less for each pole installation
- Anchor-based – upward of $600 and up to $1000 (using concrete base)
- Helix foundation – up to $700
How much does parking lot light pole installation cost?
A parking long light pole and fixture installation can cost you in the range of $600-$1000 since anchor-based installation is the most likely method you’re going to use.
However, depending on the type of light pole and fixture, this cost can go up.
For instance, if you’re installing a solar-powered parking lot light pole, the installation cost can go up to $1500. Nonetheless, you can also recover your initial investment since solar-power lights have an impressively low payback period with zero running costs.
Bonus: here are some tips and tricks that you can go through for an effective pole installation.
Conclusion
As you can see, installing a light pole is more tricky than it seems. Nevertheless, with the right planning and effective installation steps, you can complete one such project with flying colors.
We hope that our guide helped you understand the nitty-gritty of light pole and light fixture installations.
Looking for assistance with selecting the right installation materials or contractors for your project?
You can get in touch with us!
At Eco-$mart Inc, we have the most diverse range of sustainably manufactured construction materials for both commercial and residential requirements. This includes solar and wind-powered hybrid street lights and solar-wrapped light poles that can bring your energy bills down to zero.
Also, we can get you in touch with the best no-frills street light installation contractor firms in the region.
Meaning we’ve got all your installation material needs covered.


Leave a comment