A DIY solar panel installation can save you over one-fourth of your total investment
Solar panel installations are the order of the day for a lot of residential buildings. And this trend is more evident among single-family homes with ample space to go 100 per cent solar.
In fact, factor in the reduced solar panel prices and lucrative tax incentives, and you’ve got the best time to go solar.
Nevertheless, if figures from the Energy Information Administration are any suggestion, only 3.7 per cent of homes have a solar setup.
Thankfully, DIY solar panel installation offers the perfect solar gateway for a majority of homeowners.
You see, despite all the rewards of solar, the large upfront cost is still an obstacle. However, DIY eliminates the need for installation labor, effectively bringing this cost down by over a quarter.
Not to mention, a DIY solar installation can be a fun and collaborative venture, apart from the unmatched control it offers on your project.
Now, if you’re curious as to how you can install solar panels DIY, we’ve created a detailed step-by-step installation guide. Also, we’ve dwelled upon the pros and cons of such installations, among others.
So, let’s dive right in and have a look.
Can solar panels be installed DIY?
Whether or not you can install solar panels by yourself is a million-dollar question that almost every potential solar buyer has. So before we get into the how and about of solar panel DIY, let’s try and understand if such a project is possible at all.
Simply put, installing solar panels DIY is indeed possible. And depending upon the scale of your project, you can either do it entirely by yourself or with the assistance of a few people.
For instance, installing PV panels to meet your lighting or heating requirements may not need a team effort. However, you might need some support when working to take your home completely off the grid with solar energy solutions.
But it goes without saying that solar panel installations can be very complex. Our local solar installation companies with a range of expert services speak to this fact.
Moreover, if you’re a beginner looking to DIY your solar panels, it can be a challenging undertaking.
Nonetheless, with a little time and effort, you should be able to acquaint yourself with solar panels and their installation requirements, thus paving the way for a successful DIY project.
Fun fact: According to Energy Information Administration (EIA) figures, residential solar installations in the country produce about 3.9 gigawatts of energy.
A step-by-step DIY solar panel installation guide
Installing your solar panels by yourself is easier than it seems. And while you’ve to take care of the technical and safety aspects just like a professional, with the right steps, you can do it successfully.
Here are the steps that you can follow to complete your DIY solar installation:
Step 1. Decide on the size and scale of your project
The first step in DIY solar panels installation involves finalizing the capacity and the total number of panels you need. And this depends on the total energy consumption in your home and the extent of energy loading you want to shift to solar.
Now, measuring your home’s energy requirements precisely is essential as it determines the kind of solar panels you purchase. As such, we suggest you take into account factors like the overall loading of household appliances, HVAC systems, lighting fixtures, etc.
Similarly, the type of solar energy solution that you want to go for will also decide your project’s size.
For instance, residential solar PV systems can be anywhere from a grid-tied system to a hybrid system to an off-the-grid system. Here’s what each of these systems includes:
A. Grid-tied solar energy system
This type of system involves a limited number of solar panels to meet specific needs such as lighting or heating. The home is still connected to the grid and depends on grid energy for other requirements.
B. Hybrid solar energy system
This is the most common type of solar PV system, with enough panels to cover the entire household’s energy needs and also produce more energy in the right conditions. The excess energy might be sold to the grid.
Also, the home receives grid energy if PV panels don’t produce enough energy in cloudy or snowy conditions.
C. Off-the-grid solar energy system
As the name suggests, an off-the-grid system is one where your solar panels produce enough energy for all your needs. Herein, your home isn’t connected to the grid and is often connected to a chargeable power backup for situations when PV panels aren’t as effective.
Step 2. Buy your solar panels and accessories
Having figured out exactly what kind of solar energy solution you need, it’s time to shop for PV panels as well as other accessories.
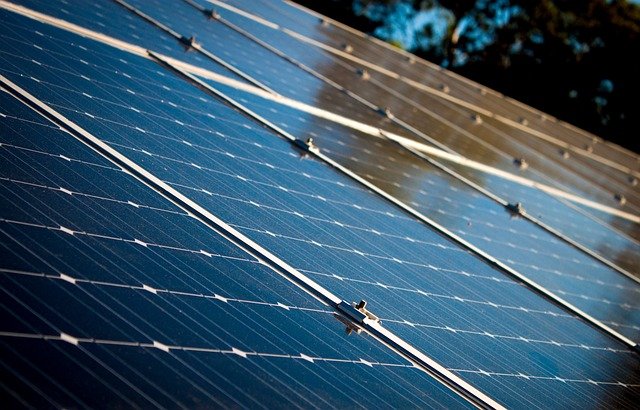
To start with, you should look for solar panels that offer the perfect combination of efficiency and affordability. And to that end, we suggest you skim through reviews, both online and offline, and then choose the panels that are compatible with your requirements.
You see, it’s easy to fall for the claims made by the top solar panel brands. Nevertheless, you should make your decision based on factors such as energy output, service life, durability, power generation capacity in bad weather conditions, etc.
Next up, you need to buy the accessories required to install and run the system. This includes racking, inverters, batteries, cables, etc.
Like the PV panels, it’s essential you go for the top-notch accessories when installing solar panels DIY. After all, a solid installation and an effective functioning of the system depend on the quality of the accessories.
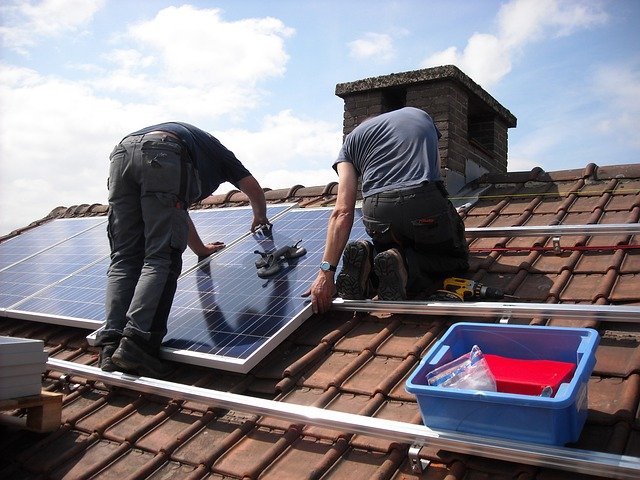
Step 3. Install the racking or mounts
With all the essential components and parts handy, it’s now time to finally get started with the actual DIY aspect of solar panels by installing the panel racking or mounts.
But before you start working, it’s important that you’ve finalized a few things. For instance:
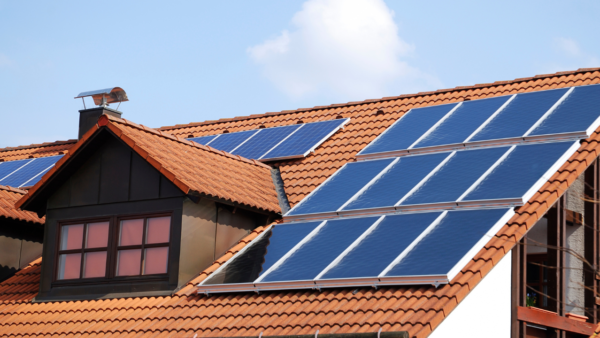
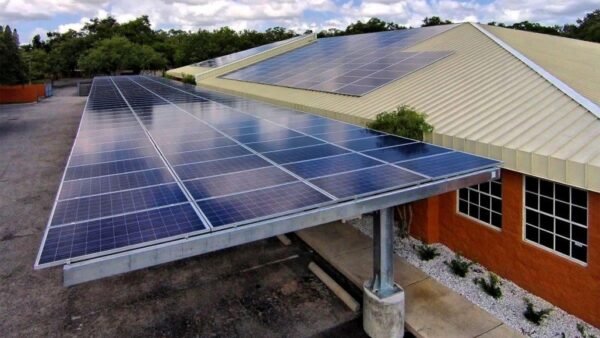
- You should decide on the location of the installation. Solar panels can be installed either on the roof or on the ground, meaning you can pick any convenient location between the two.
- The solar panel installation design should be completed, and the required permits from local authorities should be obtained.
- You should have all the essential tools and equipment handy for installation.
Now, for installing the solar panels on the roof, you’ll need to install the racking and mounting gear at a safe and accessible spot.
You can start with marking such a location, making a drill for lag bolts, caulking the drill hole, and using the proper wall plugs for masonry surfaces.
Coming to ground installation, you can follow the same procedure as in roof installation. However, you might need to install an additional racking system for solar panels on the ground since these are flat surfaces, unlike the roof.
Sounds like too much of a hassle?
Well, you can avoid solar panels altogether by going for solar roofing shingles in the first place.
Solar shingles are like any other roofing shingles, the only difference being that the former is covered with PV cells that generate electricity, just like conventional panels.
Interesting, isn’t it?
Step 4. Install all other equipment
Once the racking and mounting gear is in place, it’s time to work on installing the major electrical components, such as the inverted and solar panels.
You can divide the entire process into three parts, namely:
A. Inverter installation
Inverters are the most essential components of a solar energy system after the panels. That’s because they turn the energy generated by the PV panels into safe and usable electricity.
Also, inverters are mostly paired with battery storage systems to store electricity for times when PV panels aren’t producing electricity, such as during dark hours.
You can use bolts provided with the solar panel kit to install the inverter.
B. Grounding wire connection
Another major aspect of solar panels or any electrical installation is the connection to a grounding wire.
A grounding wire is a regular copper wire that ensures the safety of the electrical components during lightning strikes. So, it is crucial that you connect all the solar panel system components with a grounding wire.
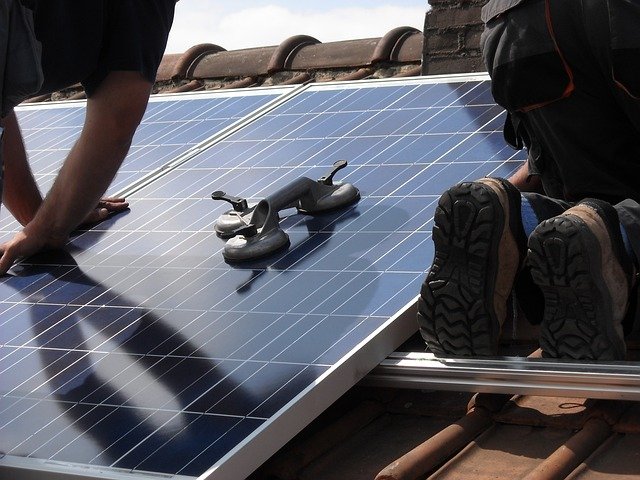
C. Solar panel installation
Installing solar panels is relatively easy after you’ve installed all other accessories the right way. All you’ve got to do is attach the panels to the racking system and bolt them.
Easy, right?
Step 5. Connect the system to the electrical line and get it running
This is the final step in DIY solar panel installation that involves connecting your newly installed residential solar energy system to the main electrical board.
But before you start running the system, we suggest you reach out to the local electrical and construction safety authorities and schedule an inspection.
One such inspection will not only ensure full-proof safety but also allow you to connect the PV system to the grid and sell excess solar energy.
You might also want to read – The 8 Best Solar Street Lights In 2025.
Pros and cons of DIY solar panel installation
Like all things solar, a DIY installation of PV panels has numerous advantages. Still, a lot of critics have also come up with the downsides of such installations.
And to make informed decisions, it’s important that you’re aware of both sides of DIY. So, let’s have a look at both the positives and negatives of DIY solar installation.
The pros:
1. Big ticket cost savings
One of the primary motivations for DIYers to go for a full-scale DIY installation is the huge cost savings that it offers.
You see, labor costs are among the most inflated expenses when it comes to home construction or improvement. And that’s especially true for skilled solar installation professionals.
In fact, estimates from Angi suggest that labor and permits can together cost you 25 per cent or about a quarter of your overall project cost.
Meaning by simply not hiring installation labor, you stand to save big on your residential solar investment.
2. Complete control over the project
Savings apart, DIY lets you have a complete say over the project, something that’s nearly impossible otherwise.
How, you may ask?
Well, installation companies will have their own designs, blueprints, and way of working. And while they do ask for your preferred installation location, they’ll work independently and would expect you not to interfere in their work.
3. DIY installations are fun and creative ventures
A lot of people opt for DIY projects simply for the fun and engagement that they offer. Not to mention the sense of satisfaction and accomplishment that comes after a successful completion.
A DIY solar installation is not different either. Think about it as an opportunity for family and friends to come together and showcase their creative and collaborative flair.
The cons:
1. Solar panel installation calls for expertise
Unlike DIY furniture or home decor projects, PV panel installation is a complex process that requires a detailed and in-depth understanding. So much so that even a small mistake can lead to big damages, rendering the entire system useless.
Also, a faulty installation can pose a huge safety concern not only during the installation process but also when the system is in use.
And that’s exactly why a lot of experts argue that such projects should be left to seasoned experts.
2. Installing solar panels DIY is time-consuming
Another critique of DIY solar installation is that such a project needs a lot of time, and hence, a lot of people can’t opt for such installations.
For instance, such a project can take anywhere from a few weeks to a few months to complete.
In short, DIY solar panels might not be the right option for you until you’ve got a lot of time and patience.
3. Maintenance is yet another headache
Even if you’ve successfully installed solar panels by yourself, you’ll still face a tremendous challenge in terms of maintenance.
That’s because while solar panels have a long service life of over 30-35 years, you need to frequently maintain the panels to ensure that they last for so long. And this also calls for knowledge and expertise, something beginner or hobby DIYers lack.
DIY solar installation: frequently asked questions

FAQ 1. Are DIY solar panels worth your time and investment?
Yes, it is.
You see, whether or not a DIY solar panel installation is right for you is always up for debate. In fact, it’s hard to ignore this debate across online forums.
So you may find yourself asking if you should go for one such project. More so, as such ventures might call for months of exhaustive work.
However, on the bright side, the returns of a successful DIY solar installation are endless.
For instance, such an installation can take care of your entire household’s energy needs for the next 35 years. As such, you can not only recover your initial investment but also save big in the long run.
Similarly, you can avail the federal investment tax credit (ITC) on solar and recover up to 30 per cent of your upfront investment.
FAQ 2. How much does it cost to install solar panels DIY?
The major cost for a DIY solar installation project is the panel kit itself. And depending on your energy needs, you can get a whole-house solar panel kit for anywhere between $6,000 and $11,000.
Similarly, you can also get a smaller solar panel kit between $1500 and $2500 to create a grid-tied system.
FAQ 3. DIY vs. professional solar panel installation: Which one should you go for?
Although complex, a DIY installation is something that anyone can undertake with a little effort in learning the different aspects of solar panel installation and working.
Nevertheless, if you have little knowledge or lack the time, getting solar panels professionally installed would be the ideal option for you.
Conclusion
As you can see, a DIY solar panel installation isn’t so difficult after all.
In fact, by following the steps and procedures accurately, you can complete one such installation safely and successfully.
Looking for the right solar panel kit for your DIY project?
You can reach out to us!
At Eco-$mart, we have the most extensive solar inventory that goes beyond panels and shingles to include solar lighting, tracker systems, water heaters, and more.
Simply put, we’ve got all your household energy needs covered with the most efficient and affordable solar energy solutions.
Leave a comment